As an Amazon Associate, we earn from qualifying purchases. Some links on this site are affiliate links at no extra cost to you. Our recommendations are based on thorough research and editorial judgment.

Launch Monitor Calibration Tips For Accurate Readings
Proper calibration of a launch monitor is essential for accurate readings. Here are key tips:
- Position the device 6-8 feet from the hitting area.
- Guarantee clear sight lines between sensors and the ball.
- Perform regular checks on calibration metrics, including distance and ball speed.
- Maintain consistent environmental conditions; temperature and humidity can impact results.
- Have clean sensors and proper alignment for camera-based systems.
You may be interested


Adhering to these practices can optimize performance. Further insights on calibration processes await your exploration.
Key Takeaways
- Ensure the launch monitor is positioned 6-8 feet from the hitting area for optimal accuracy and a clear sightline with the ball.
- Regularly calibrate your monitor according to the manufacturer’s instructions, especially after environmental changes or equipment adjustments.
- Maintain clean sensors and accurate ball placement for camera/optical monitors to avoid alignment errors and inconsistent readings.
- Use suitable, high-quality golf balls and avoid worn clubs to enhance data accuracy during calibration sessions.
- Monitor environmental factors like temperature and humidity, as these can influence air density and affect measurement precision.
Calibration Setup and Connection
In order to achieve ideal performance from a launch monitor, precise calibration setup and connection are essential. Proper placement involves:
- Ensuring the device sits on a stable surface, around 6-8 feet from the hitting area.
- Maintaining a clear line of sight between the sensors and the ball, free of reflective or moving objects.
Using appropriate connection methods is critical. Verify that connections, whether USB or wireless, are secure and that software is updated.
Calibration tools, like alignment sticks, need to be positioned accurately to enhance sensor recognition. After setup, a power cycle may confirm the connection and readiness for calibration, ensuring all parameters are aligned for peak performance. Following these guidelines can greatly improve overall accuracy and user satisfaction. Additionally, environmental conditions such as lighting and wind can significantly impact the accuracy of readings, so ensure optimal conditions are met during calibration.
Recommended Products
Autel MaxiSYS Ultra EV Diagnostic Tablet : The MaxiSys Ultra EV Autel scanner is a new generation of intelligent diagnostics for electric, hybrid, gas vehicles; AUTEL UltraEV provides a comprehensive analysis of electric and hybrid vehicles with expanded topology mapping and battery pack analysis ; The 12.9-inch UltraEV touchscreen tablet comes equipped with MaxiFlash VCMI (5-in-1) measurement device, Bluetooth-enabled vehicle communication interface and J2534 pass-thru programming device, and a dedicated EVDiag box

SPECIFICATIONS: HL high luminance sensor colorimeter measures up to 3000 nits, calibrates and profiles LCD mini LED OLED and Apple XDR displays plus compatible projectors, includes Calibrite PROFILER software for Mac and Windows, USB C connection with USB A adapter, built in 1/4" mount thread and travel storage pouch

SPECIFICATIONS; Includes Calibrite Display 123 colorimeter for monitor calibration plus ColorChecker Passport Video 2 for video and photo capture control, designed for exposure reference, white balance setup, and consistent color workflow from capture through edit.
Calibration Metrics and Adjustments

Calibration metrics play a significant role in enhancing launch monitor performance. Accurate calibration guarantees insights align with real-world conditions. Key metrics include:
- Distance Calibration: Matches simulator output with actual shot travel, enhancing reliability.
- Club Speed Calibration: Adjusts clubhead velocity for efficiency feedback.
- Ball Speed Calibration: Refines post-impact ball speed, vital for flight simulation.
- Face Angle: Corrects clubface direction to predict shot accuracy.
- Dynamic Loft: Reveals effective loft during impact, necessary for flight trajectory.
Adjustment techniques for each metric help fine-tune readings. For instance, dynamic loft adjustments may indicate amateur tendencies, guiding players towards best controlling distance and spin. Employing precise calibration metrics ultimately allows golfers to maximize their launch monitor’s potential. Additionally, utilizing foldable golf nets can enhance practice sessions by providing immediate feedback on swing performance.
Recommended Products

BUNDLE INCLUDES: Full Swing KIT Golf Launch Monitor, and Signature Series Power Bundle
Camera-Based Measurement: The Launch Pro i features a proprietary three-camera imaging system with infrared that measures performance at impact for Tour-level accuracy—eliminating the guesswork common with radar-based launch monitors that rely on algorithms.

BUNDLE INCLUDES: FlightScope Mevo Gen2 Golf Launch Monitor and Simulator, Signature Series Power Bundle, and Signature Gift Wrap
Environment and External Factors

Environmental factors greatly influence the performance and accuracy of launch monitors. Various weather impacts can skew data readings:
- Temperature and Humidity: These affect air density and resistance, altering ball speed and trajectory.
- Wind Conditions: Variability from wind speed and direction can disrupt ball path tracking, necessitating adjustments for precision.
- Barometric Pressure: Changes modify lift and drag on the ball, influencing distance measurements.
Indoor setups offer stability, reducing inconsistencies from wind and lighting. However, lighting conditions still play an important role; bright, even illumination aids trackability. High-quality mats and standardized balls guarantee consistent interactions and minimize measurement errors. Furthermore, ensuring optimal environmental adaptability is crucial for achieving the best performance from your launch monitor.
Calibration Procedures by Device Type
Accurate calibration procedures vary based on the type of launch monitor used, each requiring unique attention to detail.
Radar-Based Monitors
- Recommended calibration frequency is weekly or before serious practice.
- Proper alignment is essential; misplacement can cause inaccuracies.
- Calibrate with club-specific tools to track data effectively.
Camera/Optical Monitors
- Confirm sensors are clean; dust and glare interfere with tracking.
- Verify ball placement, making sure branding faces the camera for accuracy.
- Configure settings for distance and height for consistency.
Portable Launch Monitors
- Recalibrate frequently to account for changing environments.
- Verify device stability and setup compatibility with apps.
Overhead Systems
- Precision in installation guarantees accurate results.
- Regular diagnostics maintain calibration integrity for peak performance, similar to how oversized heads in beginner golf clubs enhance forgiveness on off-center hits.
Recommended Products

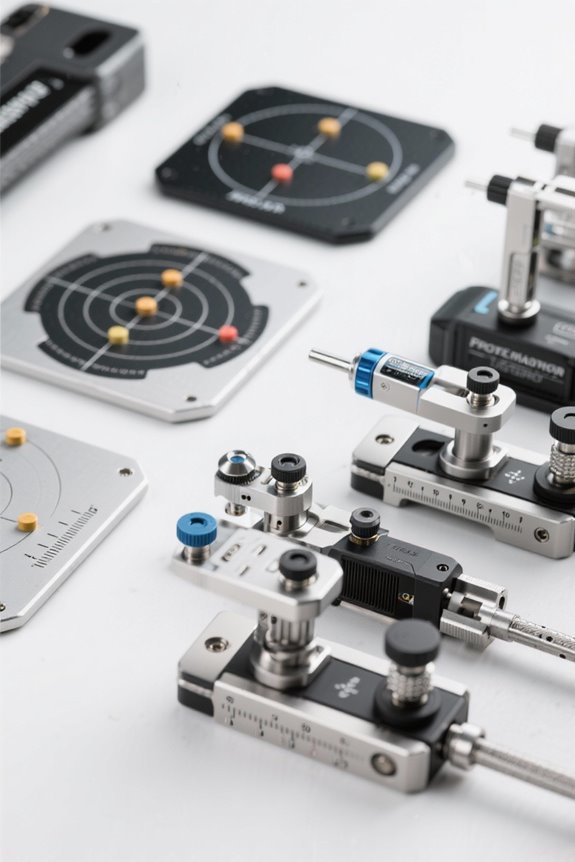
Pro-Grade Accuracy with Prometrics Engine: The SC4 Pro golf launch monitor and golf shot tracker delivers precise ball and club head data, tracking from swing to impact to ball flight, offering unmatched real-time accuracy for both indoor and outdoor practice.

This Bundle Contains: 1 Garmin Approach R10, Portable Golf Launch Monitor, Take Your Game Home, Indoors or to The Driving Range, Up to 10 Hours Battery Life + 1 Signature Series Microfiber Cloth + 1 Signature Series 5000mAh Portable Power Bank with Wall Charger and Car Plug Adapter
Work to improve your game at home, indoors or on the driving range with a portable launch monitor .Waterproof : IPX7.Control Method:Application,VoiceWater Resistant: Yes.Club Head speed accuracy : plus/- 3 mph, Ball speed accuracy : plus/- 1 mph, Launch angle accuracy : plus/- 1 degree, Launch direction accuracy : plus/- 1 degree.
Testing and Validation

Successful calibration of launch monitors requires thorough testing and validation to assure accuracy. Employing effective validation techniques guarantees that data gathered is reliable. Key steps include:
- Calibrated Reference Apparatus: Use a spinning wheel with marked balls for repeatable measurements.
- Geometric Accuracy: Confirm level placement of both fixtures.
- Image Acquisition: Utilize sensors to capture precise data.
- Cross-Validation: Compare readings against robot-hit ball data for consistency.
- Statistical Analysis: Calculate mean absolute error to quantify deviations.
Conducting tests at multiple angles and speeds further enhances test consistency. Creating a controlled environment reduces errors, assuring accurate system performance. By adhering to these principles, users can confidently validate their launch monitors, establishing a standard for reliable readings. Additionally, ensure that the realism of turf surface is taken into account when testing, as it can significantly affect the accuracy of readings.
Recommended Products
[Meet LAUNCH X431 PRO Dyno] A 2026 all-new car diagnostic scanner, boasts of flagship-level diagnostics! You’ll affordably repair 99% car issues in one solution: ✅ECU Coding, ✅All System Access, ✅Active Tests, ✅38+ Special Functions, ✅AutoVIN & Scan, ✅Remote Diagnosis, ✅Diagnostic Record & History, ✅2-Year Upgrade, ✅5-Year Quality Backup, ✅7 Optional Expanded Tools (ADAS/Scopebox/Sensorbox/Multimeter/Videoscope/BST360/X431-PROG3); ✅covering 2300+ brands, ✅CAN-FD & DoIP (Need Purchase extra DOIP Connector).

【Universal All-In-One Tool】LAUNCH PROS Elite works with more than 99% of OBD2/EOBD vehicles: 200,000+ cars from all over U.S./Europe/Asia, including 200+ brands of Buick, Cadillac, Chevy, Chrysler, Dodge, Honda, F0rd, G-M, J**p, Lincoln, B.M.W, V-W, VAZ, even fancy cars Porsche, Maserati and a lot more. It’s an all-system bidirectional scan tool, also featuring ECU Coding, 3000+ Active Tests, 38+ Hot Services with 25 Languages menu! Super handy for quick fault detection.
![Launch X431 PROS Elite [2026 New Model] Fully Functional Bidirectional Scan Tool, CANFD&DOIP, ECU Coding, VAG Guided Function, FCA SGW Cars, 38+ Resets, FCA AutoAuth, Full System Scanner for All Cars](https://m.media-amazon.com/images/I/51stjEEK38L._SL500_.jpg)
[Powerful but Cost-effective] 2026 released LAUNCH PROS ELITE holds a masterful function combination of the entire X431 series and features an unbeatable cost. Boast an astounding 99% diagnostic accuracy. Comprehensive real-time data display ensuring pinpoint issues. 1996-2026 vehicle coverage extending beyond 95% of automotive scanners. Optimized hardware goes 5x faster speed. Complete sales chain from pre-sales serving to 5-year undertaking, remote diagnostics, and 2-year free updates.
Maintenance and Recalibration Tips
Maintaining and recalibrating launch monitors is essential for guaranteeing their accuracy and longevity. To achieve peak performance, users should adhere to these maintenance strategies:
- Sensor Cleaning: Regularly inspect and clean sensor lenses with soft microfiber cloths and approved cleaners. This practice prevents data inaccuracies due to dust and smudges.
- Firmware Updates: Keep launch monitors updated with the latest firmware. This access to bug fixes and improved tracking algorithms guarantees enhanced performance.
- Environmental Controls: Maintain consistent temperature and humidity levels, as these contribute to the stability of hardware and sensor functionality.
- Periodic Calibration: Schedule monthly calibration checks, especially after repositioning, to guarantee precise measurements. Additionally, using advanced tracking technology can further enhance the accuracy of your readings.
Recommended Products

Effectively removes dust, ink & paper debris

Soft cotton swab:Soft microfiber swab, no scratch, let clean more assured.

[Professional Lens Cleaning Kit] : Dslr cleaning kit includes Lens Cleaning Pen + Camera Air Blower + Cleaning Liquid + 16mm APS-C Sensor Cleaning Swab*2 + 24mm APS Full Frame Sensor Cleaning Swab*8 + Large cleaning cloth*2 + Small vacuum cleaning cloth*6 + Anti-static gloves*1 + storage bag *1
Common Calibration Mistakes to Avoid
Many golfers unintentionally compromise the performance of their launch monitors through common calibration errors. Key mistakes include:
- Alignment Errors: Misaligning the monitor or improper ball placement skews data and misrepresents shot details.
- Skipping Calibration: Forgoing calibration or rushing through the process leads to inconsistent readings in ball speed and launch angle.
- Environmental Factors: Direct sunlight or electrical interference can distort sensor data, resulting in unreliable measurements.
- Equipment Compatibility: Using non-compatible golf balls or worn clubs can greatly impact data accuracy.
To guarantee precise readings, always adhere to manufacturer specifications. Proper setup, diligent cleaning, and mindful calibration contribute to an authentic simulation experience, allowing golfers to harness the full potential of their launch monitors. Additionally, utilizing advanced tracking tech can significantly enhance swing analysis and improve overall performance.
Benefits of Accurate Calibration
Accurate calibration of launch monitors plays a pivotal role in enhancing a golfer’s understanding of their performance. It offers numerous benefits that contribute to overall growth and skill improvement:
- Performance Enhancement: Precise measurements of ball speed and spin rate enable targeted swing improvements, effectively reducing a golfer’s handicap by an average of two strokes.
- Training Effectiveness: Accurate data fosters focused practice, allowing players to establish measurable goals like increasing swing speed or optimizing shot performance.
- Cost Efficiency: Calibration reduces unnecessary expenditures on ill-fitting clubs and minimizes the need for frequent adjustments, ensuring longevity in equipment selection.
- Improved Realism: Reliable readings replicate on-course conditions, promoting skill transfer and maximizing training productivity. Additionally, utilizing Doppler radar technology enhances measurement precision in swing performance, providing even more reliable data for golfers.
Accurate calibration solidifies a strong foundation for a golfer’s continuous development.
Frequently Asked Questions
How Long Does the Calibration Process Usually Take?
Calibration duration typically spans from 5 to 20 minutes, influenced by device complexity and user expertise. With regular calibration frequency, experienced users can efficiently optimize their setup time, fostering a shared sense of belonging in the golfing community.
Can I Calibrate My Launch Monitor Outdoors?
Yes, calibration can be performed outdoors. However, accuracy concerns arise due to changing outdoor conditions, such as sunlight and wind. Ensuring ideal placement and monitoring the environment are essential for reliable calibration results.
What Tools Do I Need for Calibration?
For effective calibration, essential calibration tools include specialized software, standard golf balls, leveling devices, and environmental sensors. Calibration accessories like measuring tapes, tripods, and alignment rods enhance consistency, ensuring a reliable setup for accurate measurements.
Is Calibration Necessary for Every Practice Session?
In a world of precision, calibration frequency considerably impacts a practice environment. Regular adjustments before each session guarantee accurate feedback, optimizing performance and reinforcing the shared goal of improvement within the golfing community.
How Do I Know if My Monitor Is Malfunctioning?
To determine if the monitor is malfunctioning, observe for monitor signs like inconsistent readings, erratic behavior, or error codes. Calibration symptoms, including missed shots and misalignment, may also signal underlying issues needing attention.


